Monday, 13 August 2018

New Engine Build

The adventures of Gus and the engine build

Background:

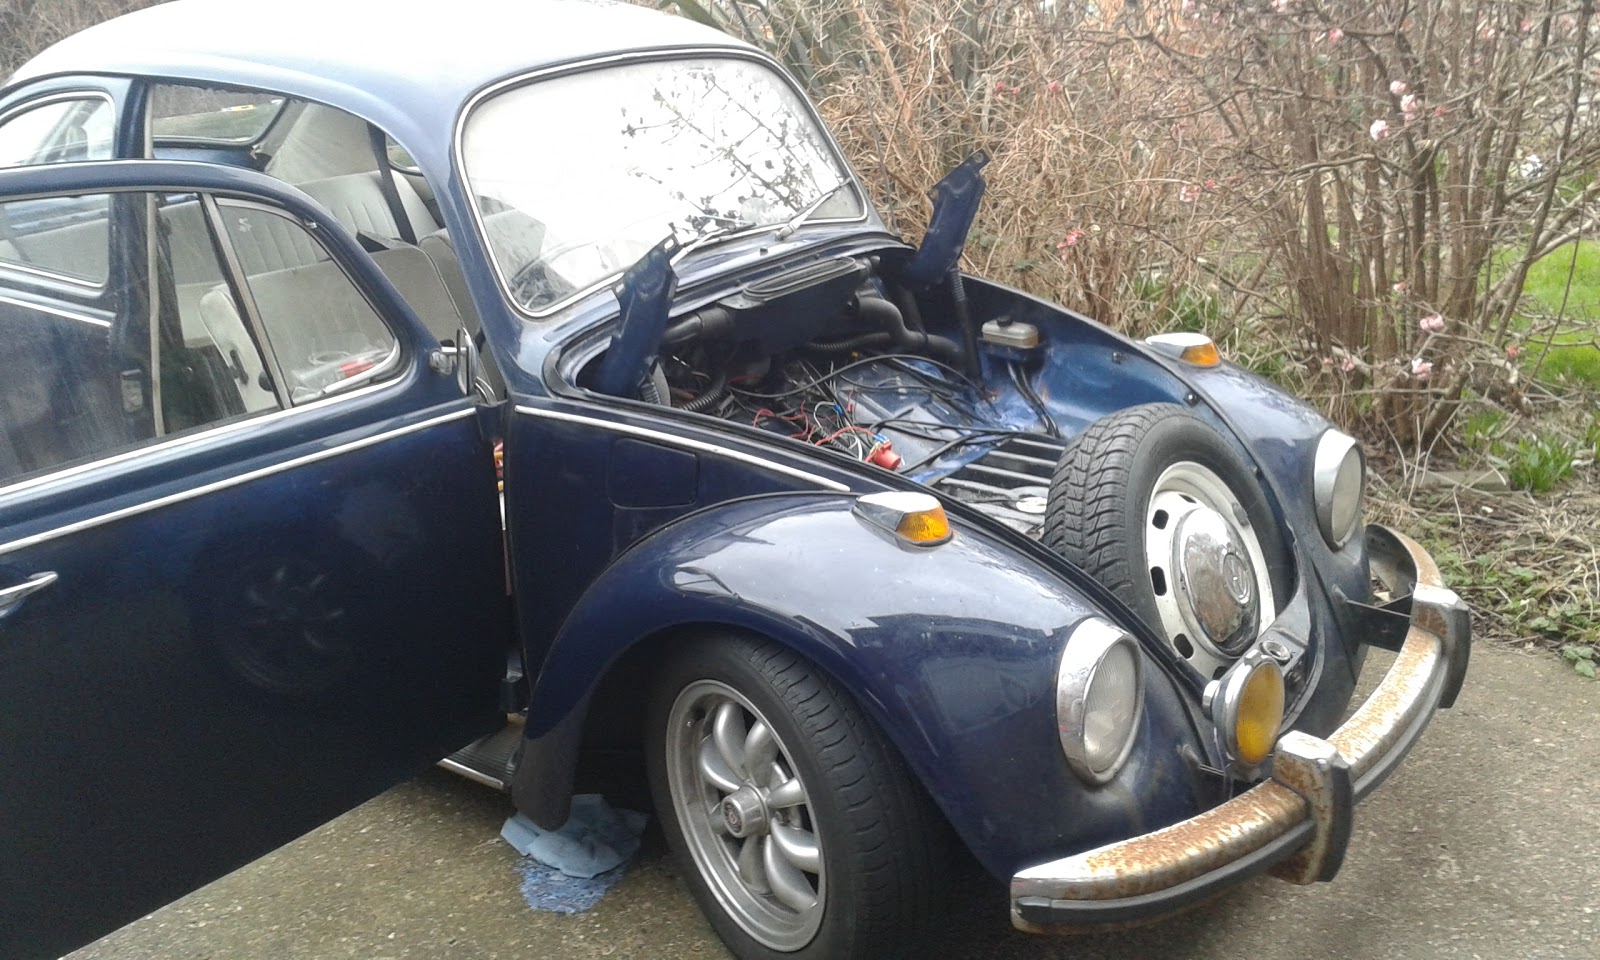
Gus the 1968 beetle has been with us for over 1 year now and he was used for a daily driver since then. The long cold winter has taken its toll on him. Rust body due to the salt and poor spray paint by his previous owners.

After a year of driving he needed some TLC. The engine which he came with had unacceptable level of end float and after daily use it was starting to sound rough and so I thought I would build up a "spare" engine to have in reserve just in case.

The Purchase:

 I was on the look out for a cheap engine as I don't have much disposable cash. So after a few weeks looking on e-bay I found something which had no bids and was located locally.

I thought it was worth a punt as worst I can use it as an exchange for a reconditioned engine if required.

For £100 it is a 1300 engine complete except the Pistons & Barrels.

So after a business trip to France I arranged collection.

The Cleanup

I got the engine back and started to clean it up.


Upon initial inspection all looked okay. Some slight end play and years of crust and crud.


Removing the flywheel "ghetto / guerrilla style"


Half way

A few days of wire brushing and plenty of elbow grease the case started to look okay. Not going for spotless but just wanted to get enough off to start the rebuild and be able to see any oil leaks.


Clean Enough


Rebuild Parts Required:

So the engine came with a pair of DP heads. Not in bad condition BUT the usual crack from valve seat to spark plug and general signs of poor condition. So these went in the pile of hoarder spares I have. I will also need enough parts to build up the long block including oil cooler and fuel pump. 

I have two rules when it comes to parts.

Rule 1 - Stock Rocks
- Original Stock VW parts either NOS or secondhand are best. The fit and are much better build quality than all the cheap aftermarket parts.

Rule 2 - Bargains
- I hate paying full price and the "scene tax" so always on the look out for cheap. That's why I like e-bay :-)

The shopping list started to grow to build up to long block:
  1. 1600 DP Cylinder heads
  2. 1600 Barrels & Pistons
  3. Doghouse oil cooler
  4. Doghouse oil cooler adapter
  5. Pulley wheel
  6. Breast plate tinware
  7. Under Barrel tinware
  8. Rocker covers
  9. Rocker cover clips
  10. Gasket kit
  11. Flywheel oil seal
  12. Flywheel shims
  13. Spark plugs
  14. Push rod tubes
  15. Fuel pump
  16. Oil Pressure switch
Managed to get secondhand, original stock parts of the following

1600 DP Cylinder heads
Doghouse oil cooler
Doghouse oil cooler adapter
Pulley wheel
Breast plate tinware
Rocker covers
Rocker cover clips

I had to buy these parts.

1600 Barrels & Pistons
Under Barrel tinware
Gasket kit
Flywheel oil seal
Flywheel shims
Spark plugs
Push rod tubes
Fuel pump
Oil Pressure switch

Managed to get the barrels & pistons cheap at just £80 new as they were returns as they had a bent fin! Bargain!

The collection of parts started to assemble:


Cylinder head build up:

I had to check and recondition the secondhand cylinder heads.

They where not in bad condition. Checked sellers photos and asked questions. and managed to get a low offer accepted (2 original stock heads for much less than the price of 1 new aftermarket one)

First job was to clean and remove valves


Lovely gold color!

One issue that I found was that one of the heads came with an "old" spark plug. It was really old and why did they remove all the others and leave this in.

Went to remove it and it was completely seized in! Looked like it had been over torqued and also had gone rusty. That's why there cheap. Could have got annoyed or see it as just another engineering challenge.

The worst case I will have to "helicoil". Not ideal but that is the worst case.

Soaked in penetration oil. Then removed carefully. It was tight! but came out with little alloy from the threads.

I thought I would re-tap the threads to ensure that they are all clean and sound.

Found a spark plug re tapping tool.

After the re-tap tested the threads and all went in really well. I think this tool is great as it cleans out and up the threads. Good one to have in the tool kit.

After removal of valves I spent many hours cleaning up and removing years worth of carbon. Then leak checked and reground all valves and seats. Simple leak check of filling each port with solvent and waiting to see if any leaks. A few leaks but all sealed after a good grinding.


A little leak before grinding in valve


 Good clean & polish!


Not going for a full port and polish, just a stock engine so clean is enough.


Cleaned and reassembled.


The Build:

All parts are ready and prepped so the build began.

Flywheel & End play first


Shim shim shimey

Then Moved on to Barrels & Pistons


Not forgetting the under tinware!

Note: Now you can see the bent fin. Its not on the sealing area.

Heads on next.


Rocker and Roll


Painted pulley.


Rocker Covers


Fuel pump and oil cooler fitted


Finally completed the build.

Engine Test

Did not want to fit the engine without a good test. Did not want the hassle of putting all fuel and ignition system on to fire it up.

Just wanted to check compression and oil pressure and see for any leaks or issues.

So got my old gearbox and starter motor and hooked up a ad-hoc test bench


Turned engine over and checked compression. Hooked up oil pressure send and checked for oil pressure.

All good compression spot on each cylinder at 120psi on all 4.

Learning:

A little bit of scavenge of original stock parts and bargains can build an engine.

Its just a matter of hard work cleaning, checking and reconditioning to use secondhand parts.

So I added up the bills and the Long block came to £350 and accessory addtional parts (fuel pump, oil cooler etc) cam to £100

So for £450 I have built an engine! Its not the best but better than I could afford and half the price of a "recon" engine

So it was now on to the next phase fitment.


Friday, 23 March 2018

SNOW SNOW SNOW

So its snowed in the UK during the "Beast from the East".

Here are some pictures of Gus enjoying the snow!


Friday, 23 February 2018

Bonnet Alignment

So this weeks task was to try to get better bonnet alignment.

So I had been bugging me that the drivers side bonnet alignment was about 2cm higher than the other. You could even get your fingers passed the seal.

So I took a few videos of the hinges while closing and pushing down:


As you can see there is a large amount of movement around the hinge pivot.

So Took the bonnet off


Then removed the circlip off the spring and the left hinge bracket just fell off!


After checking the pivot hinge point was completely seized and the bracket hole left in place


So the hinge pivot had seized and then was just ripping the bodywork metal around the bracket. This was the cause of the downard movement upon closing.

So removed the bolt from the hinge - This was completely seized and needed heat from the blow tourch and still it snaped the bolt so had to drill out and retap the captive nut.

So after alot of struggling cleaning up around the bracket and body work I managed to tack and re-weld the whole bracket back in. Had a few issues with access as its so tight to get a finger grider and the welding torch in such a tight space!

Had to add an addtional L shaped metal bracket to ensure it was not going anywhere. Had a few spot welds on the dash paintwork but its better than having the bonnet fly off.

The Result : Much better firm closing and opening BUT still a gap but it is now touching the seal!


Thursday, 15 February 2018

Wheel Bearings


So Gus has been faithly transporting me to and from work as my Daily driver.

Been a little cold and harsh over the winter.

However I have been keeping him on the road with a few things.

Firstly - Wheel Bearings

So he has always been noisy when driving. Initially it sound like the nearside rear wheel bearings biut slowly has developed all over noise related to speed.

Purchased a set of front and rear wheel bearings.

So jacked him up on each corner and rocked the wheels top to bottom (12 to 6 o'clock)

Found the rear wheels are okay BUT the fronts have a amount of movement. So decided to change the front bearings.

Was quite glad as the rears on a swing axle require a special puller (I finally found a puller kit which might work if and when I do the rears)

So here are the Hubs, discs and bearings with the wheel off:


So once removed and cleaned and inspected you can see that they are starting to wear - Probably not enough to replace BUT while I was here I put new bearings in just to be safe.


So everything went well on Nearside BUT disaster struck on offside!

Stupid bolt had been over tightend by previous owner and when I went to tighten it back up it BREAKS!


So on a Sunday I tried to find an M7x20mm (1.0mm thread) BUT guess what. No one sells M7!

So I had to get a new clamp nut which comes with the bolt from VW hertitate ASAP.

SO bolted the wheels on and took for a drive. Found that wheels where clashing with the brake calipers!

The calipers had already been ground down and the rear side of the wheels but not enough for correctly adjusted wheel bearings. So out with the grinder and a quite skim off and all sorted.

While the wheels where off changed speedo cable as it was starting to whine.

Then I noticed that the steering damper has come off the pitman arm. Looks like it had just popped out where the rubber bush goes through the arm. Pushed back in and fitted an over sized washer to stop it from coming outr again

All is good. Still a little noise from the rear but from is much improved. Handling improved and smooth drive.

Now just wait and fw weeks and re-adjust and also grease the front beam.


Wednesday, 22 November 2017

MOT FAILURE

So Gus has failed his MOT. Yes it's his last "official" MOT as he will be exempt from next year.
So failures are.
  1. All Indicators flash >120 times a minute
  2. Windscreen washers not sufficient
  3. Brake line rubbing against front tyres on full locks.
  4. Hole on offside rear floor plan around seat belt mount (actually around battery mounting)
  5. Fracture in bodywork offside near suspension mounts.


So the plan is.

1. All indicators - thought a ground issue but it's all so purchased a new relay.

2. Windscreen washers - already fitted an electric pump but it takes about 15 seconds to pump water. Fitted a cheap one way non return valve on the outlet of the water tank to stop gravity.

3. Yes the flex pipes bent the wrong way and the nearside one touches the tyre and started to rub at full left lock. So purchased two 360mm long ones as the others where way to big and brackets bent at an angle. Fitted and bled the brakes. Simple job the only hard bits where getting the jack under the front beam (I hate lowered cars. There is only 13cm from the ground to the beam) I had an old scissor jack which I used to raise it just enough to slip the trolley jack under. Also the spring clips holding the flex to solid pipes took a while to remove.

4. The MOT  guy did not have a clue where the seat belt mounts are and mistook the battery clamp bolt as the seat belt mount. Anyway he would have failed him on the battery mounts anyway. Not much of a hole just front and back battery clamps have holes.

5. This is another one as the area marked as a fracture is a non welded area where the shock mounts curve round the swing arms. It's just a bit of body and nothing to do with the suspension but it could be within the prescribed suspension area. It looks like the previous owner just forgot to close up after the inner arch wing was completed.

So here are the pictures of the affected areas.


Spent a day cutting and treating the affected areas.


Rust on the battery tray is worse than expected and the hole got bigger as always


Created a small curved folded repair patch to cover the plate and spot welded it in place


For the area around the rear wheel arch. Welded the "crack" in the old original metal


Then fitted a closing plate over and around the original metal to help support it.


Seam welded the patches and then ground them down (sorry no pictures) then applied a POR-15 treatment and seam sealant around the welds.

Will take some more pictures of the final results.

WARNING - If using POR-15 don;t be stupid like me and get it on your Skin! Hot it on my hands and arms and NO solvent will remove it ever! Period. Tried everything it takes 4 days to come off!

Here is a link to the POR-15 website. I used the 3 step treatment


Monday, 23 October 2017

Lumpy Idle & Hesitation Resolved

I have managed to solve the issues Gus as been having with the lumpy idle & hesitation.

So after the last post I decide to investigate the ignition system as there was a small mis-fire sometime at idle.

So the plan was to swap out all ignition components one by one.

Finally all that was left was the coil..... So I did not have a spare one so I managed to find a Pertronix Flame thrower coil off e-bay - Returned one from JK and sold via status VW on e-bay.

So It was £30 and had slight damage on the top BUT a saving of at least £20 on new.

Arrived next day and fitted it on Thursday Night.....

WOW what a difference. The idle is smooth and it has also massively reduced the hesitation! GREAT

Best money I have spent and it goes perfectly well with the Pertronix Ignigtor electronics points.

So Gus is like new and goes SO MUCH BETTER!

No I can get the back end out in the Wet!

Monday, 16 October 2017

Lumpy Idle


After driving Gus everyday to and from work clocks up 32 Miles everyday.

No so bad but can take a toll on especially sitting in rush hour traffic.

BUT he does himself and me proud every day and still smiles per miles....

He has been causing a few worrying moments where he has a very lumpy idle. Very low RPM and also plenty of engine shake.

Initially I though an engine running on 3/4 cylinders but upon revving the engine it sorts itself out and he is still happy at 70mph with no loss of power.

So last weekend I did my typical see whats wrong.

1. Compression Test - Same a last time. Cylinder 2 lower at 105, rest OK at 120 but no worse.
2. Tappets reset - 2 slightly tight at 0.18 reset to 0.15
3. Plugs, HT leads,  Rotor & Cap checks - All okay swapped each and no issues


Plug on No 2 was black around top insulator- Could have been loose and blowing but cleaned and reset and swapped to a different cylinder.

Most plugs look a little rich BUT tips look normal and not completely soot covered black.

Also better rich and cool than lean and burned!


So after all that it idles better and more stable BUT I still get a random misfire noise - Not exactly a misfire at idle just a pinging noise randomly a few time a minute.

Occaisionly I also get a lumpy idle as well.

I have checked and swapped everything in the ignition except the coil.

so it could be:

1. Random air leak - Air leaks are worse at idle but don't typically cause misfire
2. HT coil arcing - Could explain misfire

Will pick up a replacement coil and see and check with the WD40 spray test

Friday, 18 August 2017

Gus Improvements so far

So Gus has been with us for a few months......

So far I have completed the following work:


  1. New Exhaust - Rear box was leaking
  2. Replaced Fuel All fuel line - Leaks and cracks along most rubber pipe - Worse one was under the tank.
  3. New Carb - Original Solex 34 Pict 3 was leaking from throttle shaft - Replaced with cheap "Empi" plan to get the original Solex re-built at some point
  4. New Distributor - Getting rid of the 009 - Went for new SVDA re-pro - Again I will find a second hand Bosch / VW when I find a good one.
  5. Replaced Spark plugs
  6. Replaced HT leads - Bosch Mexico one was broken out the box!
  7. New Distributor Cap, Points & rotor.
  8. Removed Tar Paper from Engine bay - Saggy as a wet flannel when hot
  9. Oil Changed
  10. Tappets done
  11. Timing & Carb Basic setup
  12. Fitted a "save my bug" oil temperature sensor
  13. New heater pipes from fan housing to heat exchangers

So after all this work my observations where:

  1. Great to drive when at low rpm there is hesitation and engine bogged down at low rpm. Picks up at higher rpm.
  2. Spluttering & Hesitation was only improved when timing was set to 10-12 degrees BTDC (Way too advanced) and around 40-45 at 3000rpm
  3. After a few drives the timing & points gap would need resetting. Idle rpm was low and stalling. Dwell angle was all over the place.
  4. Spluttering was much worse when cold
  5. Back fire when not accelerating (ie Idle rpm) but still moving - Engine breaking or downhills. Only little popping.
So after a few weeks use decided to upgrade alter a few things to get hesitation and spluttering.

  1. Checked compression - All about 105 psi but one at 90psi - Not as bad as I expected.
  2. Vacuum check - Again all withing the good range
  3. Points replaced with Petronics electronic points - This was simple, easy to fit and much improved.
  4. New Vacuum advance unit - My distributor was only 1 month old but the vacuum unit had failed
So after these mods the electronic points give much better idle, spark smooth rpm throughout the range. Idle is a little high around 800-900. Vacuum advance stops the little backfires as retards the timing when throttle closed.

Managed to get the timing at 7.5 BTDC and full advance around 35 TDC at 3000 rpm. So much happy cooler engine

Hesitation and splutter - still there when cold (after choke has gone off) but only for about 5-10 minutes its fine.

What I am thinking is that the lack of thermostat & pre-heat of air and pre-heat of TP manifold (Both exhaust pre-heater are blocked) its a small amount of carb icing and also the fuel accelerator pump fuel is not atomizing due to the cold air and cold manifold.

Plans for engine work is:

1. Thermostat - Got an original working one but flaps feel a little sticky so wait until I drop the engine
2. New manifold - Got an orginal TP mainfold - Need to unblock the pre-heat tubes and wait until engine is dropped.
3. Rebuilt Solex - Get my old carb rebuilt - Wait until I got the money!
4. Inlet Air Pre-heat - Got rear tin and stove pipe BUT my airfilter is 1966 version (Pipe on left) and need to find a good secondhand air filter with pipe on right.
5. Sort out end play - See if I can set end float with some shims. Drop engine.
6. Front Engine doghouse tin - Need to get some front tin to replace crappy chrome one (too many holes due to bending)

Anyway I have grown to love "Gus" he has become one of the family and looking forward everyday to drive him to work!

Here are a few pics of the engine.


Next Posts -  History of Gus from Previous owner restoration & Plans for next work! - coming soon

New DubZen Post

 New Dubzen post: https://dubzen.blogspot.com/