Fitting new Engine
In my previous post I wrote a post on building Gus his new engine from mostly secondhand parts.
See the previous post below or here:
After the build of the long block it was time to remove the old engine, swap over auxiliaries and refit the freshly built engine.
Sounds simple BUT I ran into a few problems along the way.
Engine Removal
After driving Gus onto the ramps on the drive the process of removal began over a few evenings.
Standard engine removal process followed.
Engine out!
Engine removal process was simple. I built up a trolley dolly which fits onto the jack so its simple to hold and simple to maneuver about.
First problem / Issue was that my newly Trolley Dolly worked great to lower BUT its additional height under the jack means that it is too high and the engine cannot be rolled out under the bodywork. My Ramps just are not high enough.
So I managed to remove the engine from the trolley and drag it out under the body work.
Lots of manhandling and tipping the engine later (had to remove carb and slide it out under the holes which the exhaust go through under the rear valence)
Finally the old engine is out
Old Engine Stripdown
After removal I decided to strip down the old engine auxiliary off.
Lots of parts and easy to remove. I really love working on VW air-cooled engines!
Trolley Dolly makes a nice seat in the sunshine
Done
Parts parts and more parts!
A few "spare" nuts found!
Cheap aftermarket chrome crap!
Found a few issues.
Cannot believe the fuel hose has cracked. I replaced ALL fuel lines with NEW SAE R9 Fuel hoses
(Purchased from reputable VW parts dealers 10 months before!
PLEASE PLEASE check all your VWs fuel lines even if new!
Moving new engine - Simple - NOT
Our house has to be the worst case to work on cars! It has the following points all which have conspired to make it the worst:
- I have a large workshop at the furthest point away from the road & driveway. Great.
- It has 8 flights of stairs between the workshop and the drive
- Two grass lawns
- Brick paving & slabbed patios
- 2 Gates
- Side passageway approx 1m wide between house and driveway
- Sloped driveway
- Large concrete driveway enough for 3 cars. Great
So I needed to transfer the new engine from the workshop to the drive overcoming all the obstacles in my way.
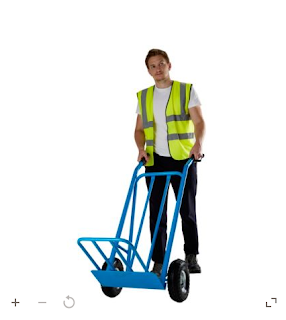
So in an A-Team moment I bought a sack truck and Built a RAMP!
Trolley £28 B&Q
The Ramp!
After a little construction and clearing the way, the eldest son & I managed to man handle the new engine to the driveway!
New engine on Drive & old engine in workshop.
New Engine buildup
Onto the build up stage. So it is just a simple process of building up the long block with ALL the auxiliaries.
Job done!
Took me a nice sunny afternoon and a few cups of tea!
Fitting New Engine
Started to fit the new engine.
Oh dear.... This is where it all started to go wrong.
- Went to re-fit old engine clutch - Too big
- So new engine must be 180mm clutch.
- Ordered 180mm clutch - 180mm Too small
- Measured flywheel on new engine - 200mm
- Checked original engine clutch diameter - 210mm??
- Very confused. So checked flywheel teeth & Diameters
- New engine has 200mm Clutch with 109 Teeth!
My understanding was that you have 12V and 6V flywheels
6v=109 teeth 180mm
12v=130 teeth 180 & 200mm
BUT I have a 6V / 200mm /109 teeth flywheel!
Also I don't have a clue what flywheel was fitted to original engine (210mm??)
I found out there is a 1 year when a Type 2 Splitscreen in 1967 was fitted with a 6V 1500 cc (H0 1966-67 1500cc)
VW where worried about the additional power of the engine size increase they fitted a bigger clutch diameter but as it was still a 6V electrics they kept the 109 tooth. These engines also used a non stepped crank shaft without O ring, so swapping to a 12v flywheel was out of the question.
So this was a problem as I have a 12V starter motor & Bush and I needed to swap to a 6V with an adapter bush.
I managed to purchase a cheaper 200m clutch and a 6V starter motor was donated to me by a nice guy from a forum (Thanks TonyGhia)
Fitted the 6V starter motor running from 12V supply spins like a banshee but good enough.
Once this was overcome I fitted the engine and connected everything up.
Guess what?
He started up first time once fuel had got through!


No comments:
Post a Comment